Adding ads to a custom-built site is a great way to turn your hard work into a passive income stream. While platforms like WordPress have plugins to handle the heavy lifting, a custom HTML website gives you full control over the code.
Here is a straightforward guide to getting your site ready and placing those ad units exactly where you want them.
Step 1: Prepare Your Website for Approval
Before you can start displaying ads, your website needs to meet a few basic requirements. This ensures a good experience for your users and your future partners.
Create Essential Pages: Make sure you have an “About Us” page, a “Contact” page, and a “Privacy Policy.”
High-Quality Content: You should have at least 10 to 15 well-written articles or pages.
Easy Navigation: Users should be able to find their way around your site without getting lost.
Step 2: Connect Your Site to the Ad Platform
Once you have your account ready, you need to link your custom HTML site to the service. This is done by adding a small piece of JavaScript code to your site header.
Log in to your dashboard and look for the “Sites” section.
Add your domain name.
Copy the provided code snippet.
Open your HTML file (usually index.html) and find the <head> tag.
Paste the code right before the closing </head> tag.
By placing it here, the script loads across your entire site, allowing the system to verify that you own the domain.
Step 3: Choose Your Ad Type
When working with custom HTML, you generally have two choices for how ads appear:
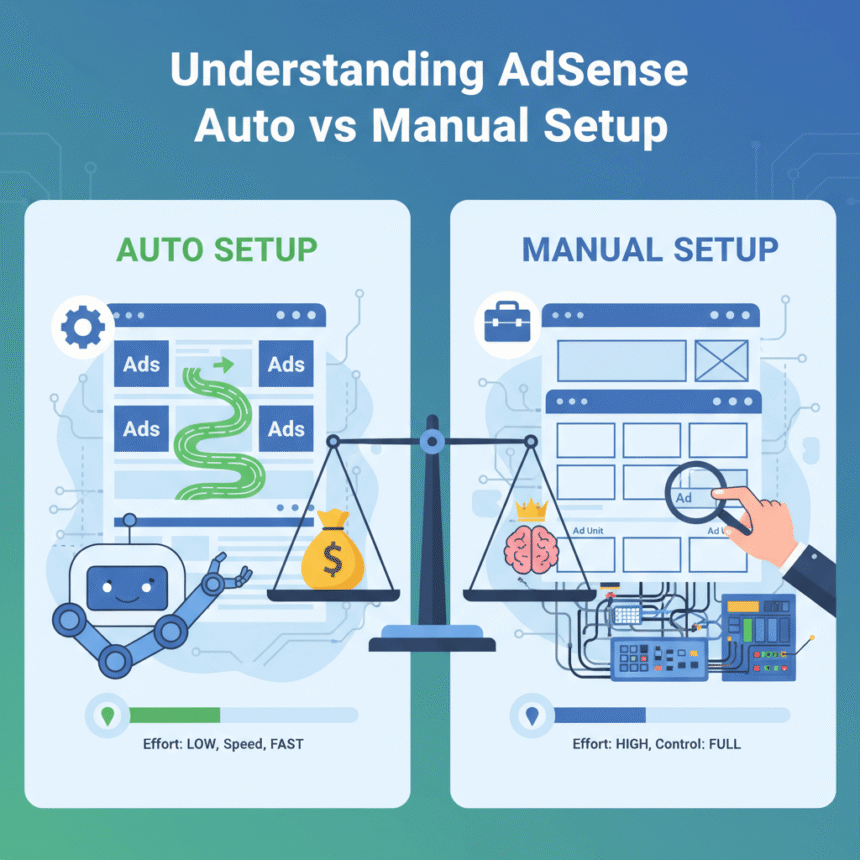
1. Auto Ads
This is the easiest method. You just toggle a switch in your dashboard, and the system uses machine learning to find the best spots on your pages to place ads. You don’t have to touch your code again after the initial setup.
2. Manual Ad Units
If you want total control, you can create specific ad units. This is perfect if you want an ad to appear exactly after the second paragraph of every article or in a specific sidebar.
Step 4: Manually Placing the Code
If you chose manual units, follow these steps:
Create a new “Display Ad” in your dashboard.
Choose the size (Responsive is usually best for mobile users).
Copy the code block provided.
Go to your HTML file and find the exact spot where you want the ad to show.
Paste the code. For example, if you want it under a heading, it would look like this:
<h2>My Awesome Blog Post</h2>
<div> (Paste your ad code here) </div>
<p>This is the start of my article content...</p>
Step 5: Setting Up the Ads.txt File
This is a vital step that many people skip. An ads.txt file is a simple text file that tells the world who is authorized to sell ads on your site. It protects you from fraud.
Create a new file in your root folder named ads.txt.
Paste the specific line of authorization code provided in your account dashboard.
Save and upload it to your server. You should be able to see it at yourwebsite.com/ads.txt.
Final Tips for Success
Wait for Review: It can take anywhere from a few days to two weeks for a site to be fully reviewed and approved.
Don’t Click Your Own Ads: This is a very important rule. Clicking your own ads can lead to your account being banned.
Check Mobile Layouts: Since custom HTML sites aren’t always automatically responsive, check your phone to ensure the ads aren’t breaking your site layout.