Static websites are faster, more secure, and cheaper to host than traditional database-driven sites. Whether you use Hugo, Jekyll, Gatsby, or even just plain HTML, you have a lean machine that delivers content instantly. However, many developers and writers wonder if they can effectively monetize these sites since there is no “backend” to manage the process.
The good news is that integrating ads into a static site is straightforward. Because the ads are delivered via JavaScript, they work perfectly with the static nature of your pages.
Why Choose a Static Site?
Before diving into the setup, it is worth noting why this combination is powerful:
Speed: Static sites load incredibly fast. Better performance often leads to better user engagement.
Security: Without a database or server-side plugins, there are fewer holes for hackers to exploit.
Scalability: Handling a massive spike in traffic is much easier when you are just serving flat files.
Step 1: Prepare Your Website
Before you add any code, ensure your site is ready. You need a custom domain (like .com or .org) rather than a subdomain from a free hosting provider. You also need original, high-quality content. Aim for at least 15 to 20 well-written posts to show that your site provides value to readers.
Step 2: Adding the Ad Code
Once you have your account ready, you will be given a snippet of JavaScript code. This code needs to be placed within the <head> tags of your website.
On a static site generator, you usually don’t have to add this to every single page manually. Instead, you add it to your “base” or “head” template file.
For Hugo: Look for layouts/partials/head.html.
For Jekyll: Look for _includes/head.html.
For Gatsby: You might use a plugin like gatsby-plugin-google-adsense or modify html.js.
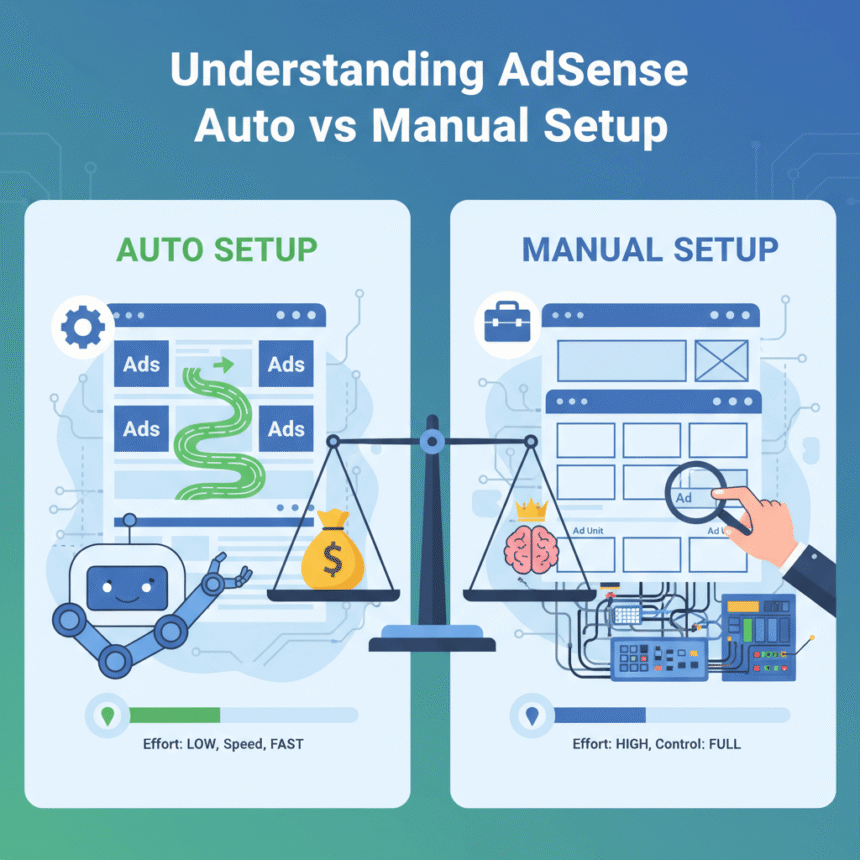
Step 3: Choosing Between Auto Ads and Manual Units
You have two main ways to display ads on a static site:
Auto Ads: This is the easiest method. You place one piece of code in the header, and the system uses machine learning to decide where ads should appear. It is hands-off and adapts to your layout.
Manual Units: If you want total control, you can create specific ad blocks (like a banner or a sidebar square) and paste that code exactly where you want it to show up in your HTML.
Step 4: Verification and the ads.txt File
To ensure your site is verified, you must create a file named ads.txt and place it in the root directory of your website. For a static site, this usually means putting it in the static or public folder before you deploy. This file tells the world that you are the authorized seller of the ad space on your domain.
Final Thoughts
Integrating ads into a static site is a “set it and forget it” process. Because your site is so fast, the ads will often load more smoothly than they would on a heavy, bloated platform. Just remember to keep your content updated and stay focused on your audience’s needs.